The process involves extracting the brake fluid out of the system, removing the caliper, cleaning the piston, rebuilding the caliper and refilling the reservoir. Follow the steps below to rebuild the rear brake caliper for a Honda CBR600 motorcycle.
Tools and Parts Needed – Honda CBR 600 Rear Caliper Rebuild
Tools
- 6mm Allen
- 32mm socket
- Breaker bar
- Torque wrench
- 8mm, 10mm and 12mm crescent wrench
- Angled and standard Phillips
- Set of pick tools
- Honda CBR600 Service Manual
Parts
Extracting Honda CBR 600 Brake Fluid
Step 1.
Remove rear brake fluid reservoir cap.
Step 2.
Attach the vacuum fluid extractor air hose to the rear caliper valve and turn it on.
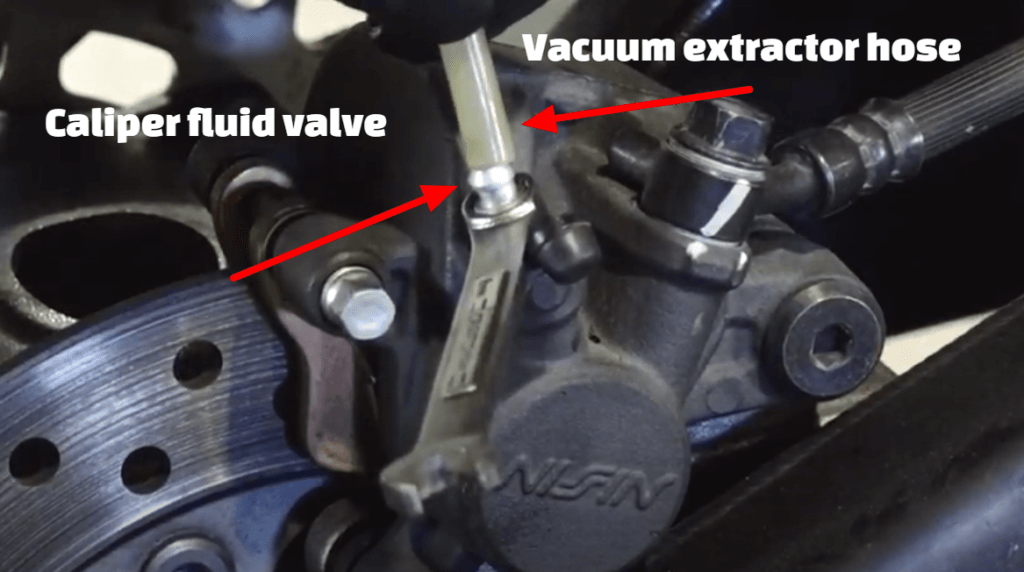
NOTE: The 8mm wrench is all you need to open and close the valve.
Step 3.
Once the majority of the brake fluid is out, close the valve and remove the vacuum air hose.
Removing Honda CBR 600 Rear Caliper
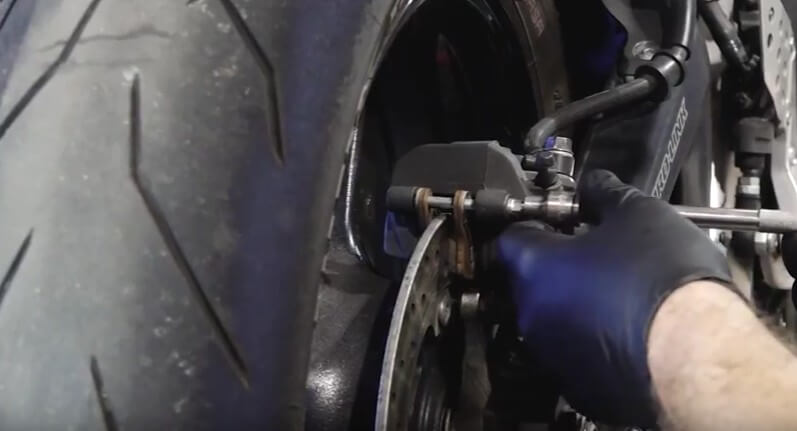
Step 4.
Loosen the banjo bolt securing the brake line so that the line can be removed from the caliper.
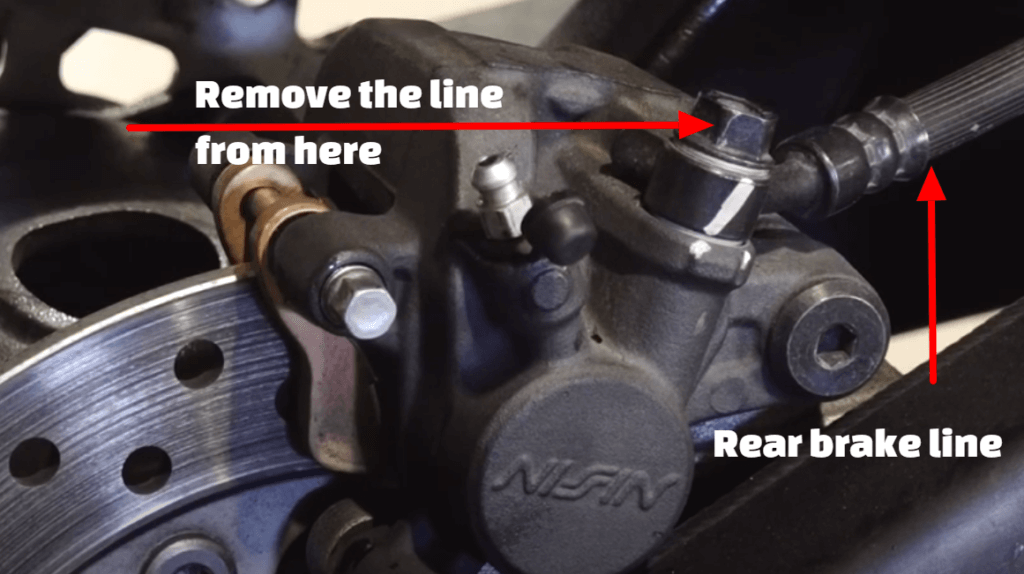
NOTE: Don’t lose either of the crush washers on the banjo bolt.
Step 5.
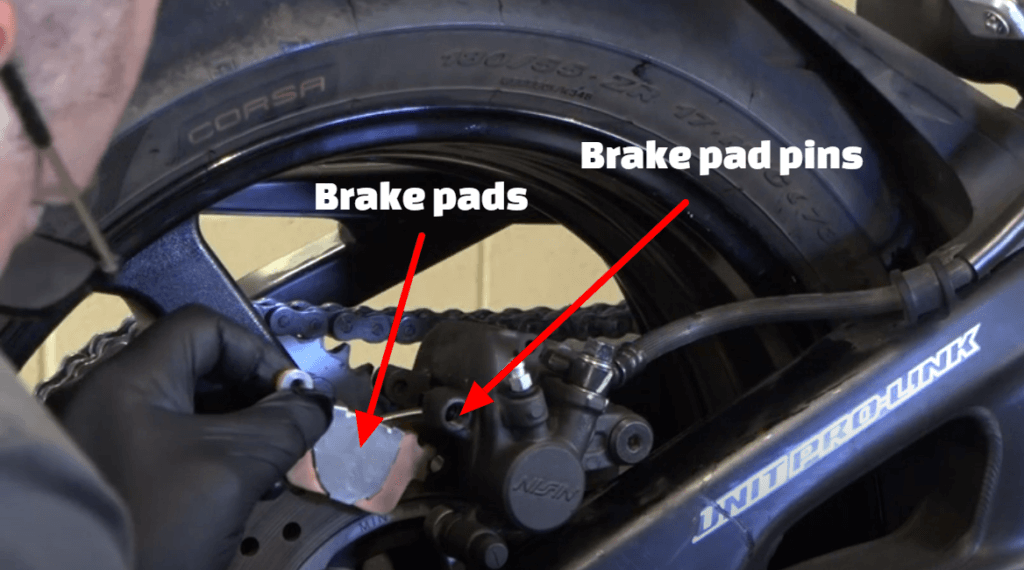
Remove the hanger pin holding the brake pads in place, followed by the pads themselves and the pivot pin.

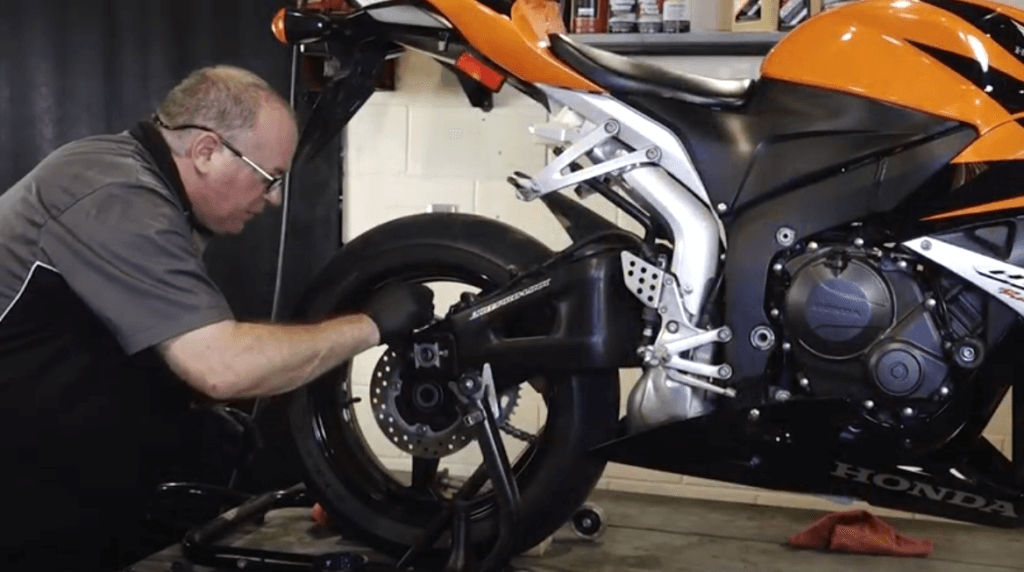
Step 6.
Using a lift stand, loosen the rear axle and pinch bolts to push the tire forward, allowing the chain to come off.
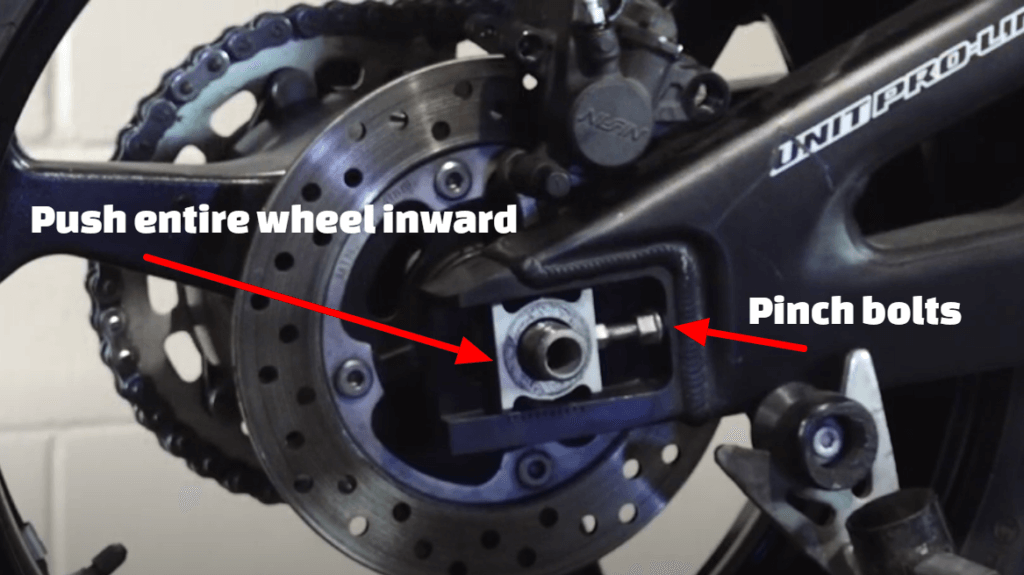
NOTE: Once the tire is out of the way, the rear caliper will fall off as well.
Step 7.
Remove the piston from the caliper.
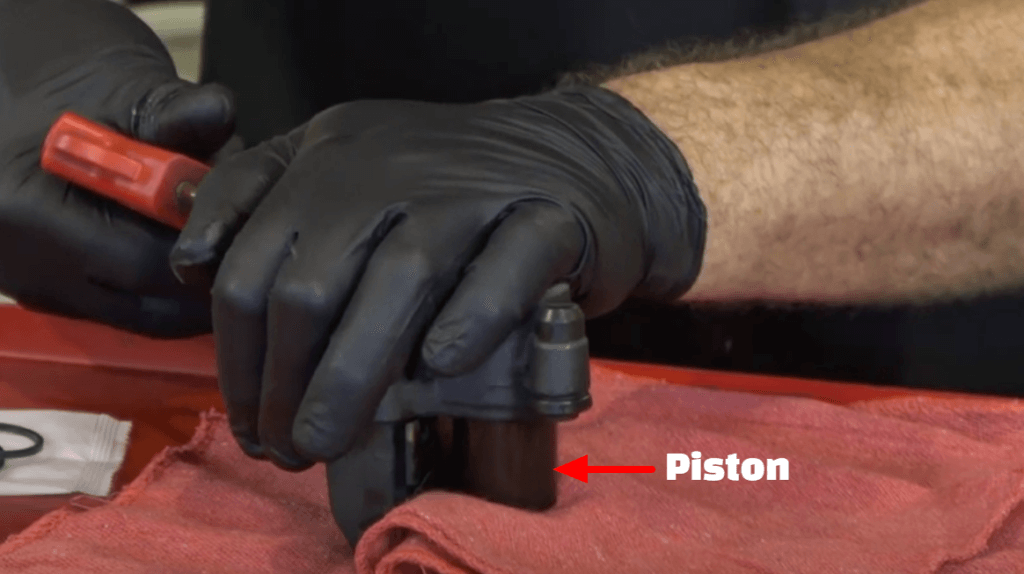
NOTE: The compressed air or air gun is the best way to do this. Be cautious, as too much pressure will cause it to fire out like a cannon.
Step 8.
Inspect the piston and look for pit marks.
Step 9.
Remove both the inner and outer seal from the caliper.
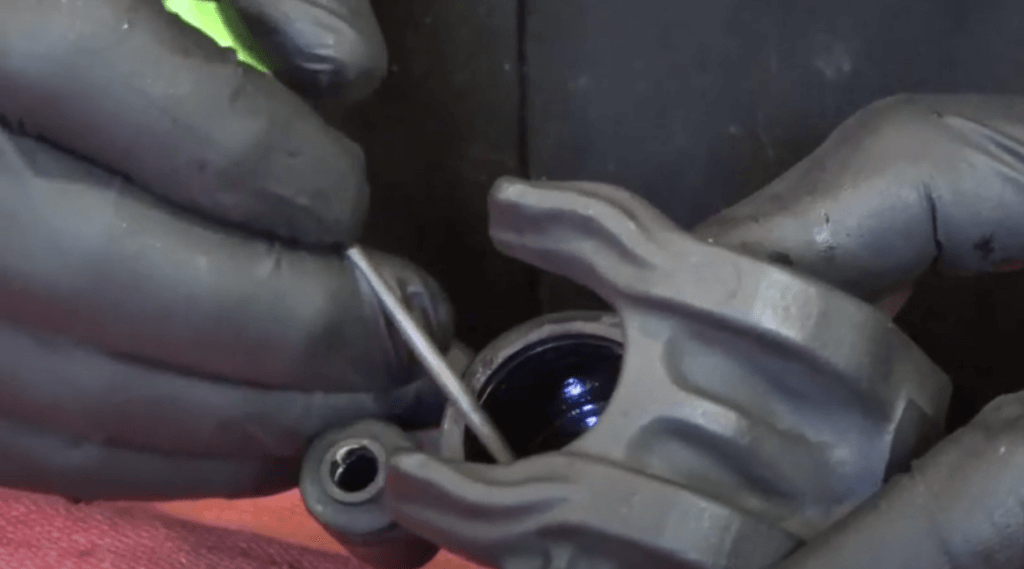
PRO TIP: The pick tool comes in handy here.
Step 10.
Clean out the caliper with brake fluid and towel dry it.
Step 11.
Insert the new piston seals, with the larger seal at the bottom and the smaller one on the top.
Step 12.
Pour a dash of DOT-4 brake fluid into the bore and rub some on the piston itself, then drop the piston into the bore.
Step 13.
Align the caliper back onto the bike with the pivot pin and secure it.
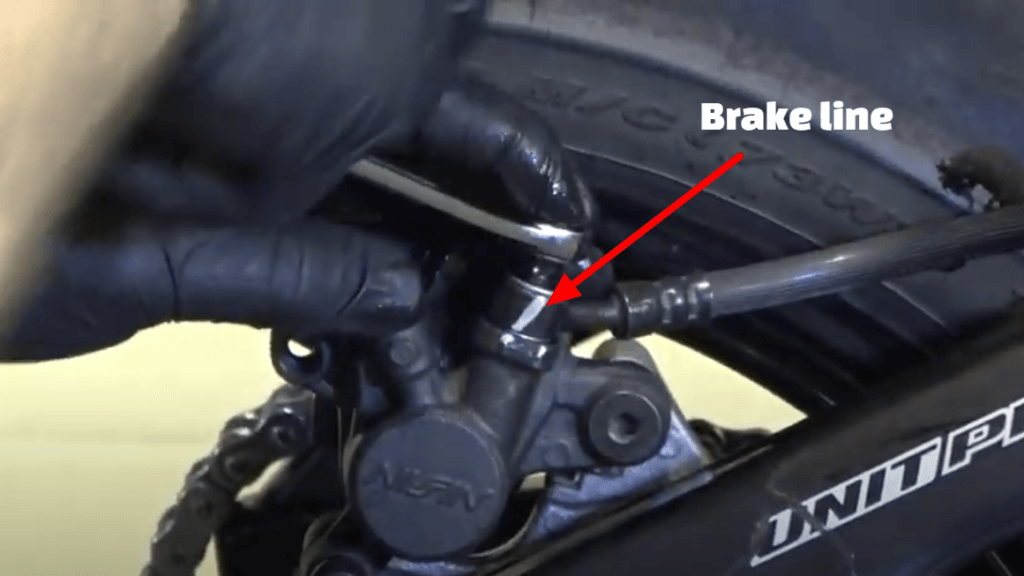
Step 14.
Attach the upper brake line to the rear caliper. Both the upper and lower crush washers must be secured to the line.
Step 15.
Align the rear wheel and chain with the axle and secure the brake hose back into place.
Step 16.
Place the brake pads back into the caliper and secure the brake pad pin. Torque the pin to 13 foot-pounds.
Step 17.
Readjust the chain tension.
Step 18.
Refill and bleed the brake fluid and you’re done.
Source: Partzilla
Be well and ride safe!